Understanding Black Mold Removal in Miami Shores After Roof Leaks
Roof leaks are one of the most common causes of black mold in Miami Shores homes. After heavy rain or storms, even small openings in roofing materials can allow water to enter attic spaces, ceilings, and wall cavities. Because the climate in coastal South Florida is warm and humid, moisture that remains trapped after a leak often leads to mold growth within a short time.
Many homeowners don’t realize there is a problem until stains appear on ceilings or a musty odor develops. By the time these signs are noticeable, mold may already be spreading behind walls or insulation. Understanding how black mold develops after roof leaks—and how professionals remove it—helps property owners take action early and prevent long-term damage.
What Black Mold After Roof Leaks Really Means
When a roof leak occurs, water rarely stays confined to one area. It can travel along rafters, soak insulation, and spread into drywall and ceiling materials. These damp materials provide ideal conditions for mold to grow.
Black mold often develops in:
- Ceiling drywall and plaster
- Attic insulation
- Wooden roof framing
- Wall cavities below leak points
- Carpet or flooring beneath affected ceilings
Because mold thrives in dark, damp environments, attic and ceiling spaces are especially vulnerable after roof leaks.
Why Roof Leaks Lead to Mold So Quickly in Miami Shores
Miami Shores experiences conditions that accelerate mold growth. Coastal humidity slows the drying process, allowing moisture to remain trapped inside building materials longer than expected.
Factors that contribute to mold growth include:
- High humidity year-round
- Warm temperatures that encourage mold growth
- Frequent heavy rain and storms
- Salt air affecting roofing materials
- Slower evaporation indoors
Nearby areas such as North Miami, Biscayne Park, and Surfside experience similar conditions, especially in homes located close to Biscayne Bay.
Common Signs of Mold After Roof Leaks
Roof leaks are not always obvious, and mold often appears gradually. Homeowners frequently notice early warning signs before visible mold spreads.
Typical signs include:
- Musty or damp odors
- Water stains on ceilings or walls
- Peeling paint or bubbling drywall
- Dark or greenish-black spots forming near ceiling corners
- Increased indoor humidity
These signs usually indicate that moisture has been present for some time.
Hidden Areas Where Mold Develops
One of the biggest challenges with roof leaks is that mold often grows in places that are difficult to see. During inspections in Miami Shores homes, professionals frequently find mold in concealed areas.
Common hidden locations include:
- Attic insulation above ceilings
- Behind drywall near leak points
- Around roof decking and rafters
- Inside air ducts located in attic spaces
- Closet ceilings or upper wall cavities
Because airflow is limited in these areas, moisture may remain trapped long enough for mold to spread unnoticed.
Why DIY Mold Removal Often Fails
It is common for homeowners to try cleaning visible mold with household cleaners or bleach. While this may improve the appearance of affected surfaces, it rarely solves the underlying problem.
DIY removal often fails because:
- Mold roots remain inside porous materials
- Hidden moisture is not eliminated
- Mold behind walls remains untreated
- Spores spread during improper cleaning
Without addressing both contamination and moisture, mold often returns within weeks.
The Mold Inspection Process After Roof Leaks
Before mold removal begins, a thorough inspection is necessary to determine how far moisture and contamination have spread.
A professional inspection typically includes:
- Visual examination of ceilings and attic spaces
- Moisture readings in drywall and insulation
- Thermal imaging to locate hidden damp areas
- Inspection of HVAC systems and ducts
- Identifying the source of roof intrusion
In many Miami Shores homes, inspections reveal moisture trapped in insulation long after the roof leak has been repaired.
The Black Mold Removal Process Explained
Professional mold removal follows a structured process to ensure that contamination is safely eliminated and conditions that support mold growth are corrected.
1. Containment
Affected areas are isolated to prevent spores from spreading to other parts of the home.
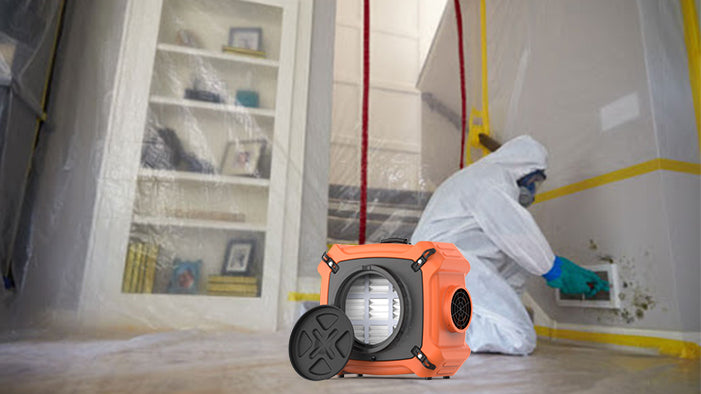
2. Air Filtration
Air filtration equipment removes airborne spores and improves indoor air quality during the process.
3. Removal of Contaminated Materials
Severely affected drywall, insulation, or ceiling materials may need to be removed to eliminate mold completely.
4. Cleaning and Treatment
Structural components are cleaned and treated to remove remaining mold.
5. Drying and Dehumidification
Professional drying equipment removes moisture from structural materials to prevent regrowth.
6. Final Moisture Verification
Moisture levels are checked to confirm that the structure is fully dry.
Companies such as Tip Top Water and Fire Damage Restoration regularly perform these steps in Miami Shores and nearby coastal communities, where roof leaks and humidity frequently lead to mold problems.
The Connection Between Roof Leaks and Indoor Air Quality
Mold growth after roof leaks does not only affect building materials—it can also affect indoor air quality. Mold spores and odors may circulate through the home, especially if HVAC systems draw air from attic spaces.
Residents may notice:
- Persistent musty odors
- Dust accumulation around vents
- Increased indoor humidity
- Reduced comfort levels indoors
Proper mold removal and drying help restore healthy air conditions.
Air Ducts and HVAC Systems After Roof Leaks
Air conditioning systems are often affected when roof leaks occur near attic ductwork. Moisture can enter ducts or insulation, creating conditions where mold spreads through ventilation systems.
During mold removal, technicians often inspect:
- Duct insulation
- Air handlers
- Drain lines and condensate pans
- Vent grilles and return ducts
Cleaning or repairing these components helps prevent mold spores from circulating.
Preventing Mold After Roof Repairs
Once mold removal and roof repairs are complete, preventive maintenance helps reduce the risk of future problems.
Helpful steps include:
- Inspect ceilings and attics after storms
- Repair roof damage promptly
- Maintain attic ventilation
- Monitor indoor humidity levels
- Service air conditioning systems regularly
Early detection of leaks is one of the most effective ways to prevent mold growth.
Why Local Experience Matters
Mold removal in coastal South Florida requires an understanding of how humidity, storms, and building materials interact. Homes in Miami Shores often experience slower drying times and higher moisture levels than inland properties.
Professionals familiar with Miami Shores, North Miami, Surfside, and Biscayne Park understand:
- How roof leaks affect attic structures
- Where hidden moisture is most likely to remain
- How coastal humidity influences drying time
- How to prevent mold from returning
Tip Top Water and Fire Damage Restoration has worked extensively in these neighborhoods, where roof-related mold issues are a frequent concern.
A Calm, Practical Next Step
Black mold after roof leaks can seem overwhelming, but it is manageable when addressed early. Inspection, proper drying, and professional removal prevent long-term structural damage and recurring mold problems.
For homeowners in Miami Shores, monitoring ceilings and attics after storms and responding quickly to leaks helps ensure that moisture problems do not turn into larger restoration projects.